OAuth 2.0 authorization grants
This page shows how to run each OAuth 2.0 grant the debugger supports. For each grant it covers when to use it, the steps on each page, and what you should see.
The steps shared by every grant are on Using the OAuth2 / OIDC workflow: loading the provider’s metadata, the configuration pane, the token request fields, and the results panes. Read that page first. The OpenID Connect flows, which add an ID token to these grants, are on OpenID Connect authentication flows.
- OAuth 2.0 authorization grants
Which grants are supported
| Grant | grant_type sent to the token endpoint |
Use it for | Choose in Authorization Grant |
|---|---|---|---|
| Authorization Code | authorization_code |
a person signing in to a web, mobile or single-page app | OAuth2 Authorization Code Grant |
| Implicit | none (the token comes back on the redirect) | legacy browser apps only | OAuth2 Implicit Grant |
| Resource Owner Password Credentials | password |
legacy first-party apps only | OAuth2 Resource Owner Password Credential Grant |
| Client Credentials | client_credentials |
a service acting for itself, with no person involved | OAuth2 Client Credential |
| Device Authorization | urn:ietf:params:oauth:grant-type:device_code |
a TV, console or command-line tool with no browser of its own | OAuth2 Device Authorization Grant |
| Refresh Token | refresh_token |
getting new tokens without signing in again | the refresh pane on step 2, after any grant that returned a refresh token |
| Token Exchange | urn:ietf:params:oauth:grant-type:token-exchange |
trading one token for another, for example to call a downstream API | the Token Exchange pane on step 2 |
RFC 9700, the OAuth 2.0 Security Best Current Practice, says the Implicit and Resource Owner Password Credentials grants must not be used. The debugger supports them so that you can test the providers that still do. If you turn on RFC 9700 compliance mode in the configuration pane, the Authorization Grant list disables both of them.
Authorization Code
A person signs in at the provider. The provider sends an authorization code back to the debugger’s redirect URI, and the debugger exchanges that code for tokens at the token endpoint. This is the grant to use for any application with a person behind it.
PKCE (RFC 7636) protects the code from being stolen and used by someone else. Use it with every client. Public clients, which have no secret, must use it.
Steps
Step 1 page
- Load the provider’s metadata, as described in Step 1: load the provider’s metadata.
-
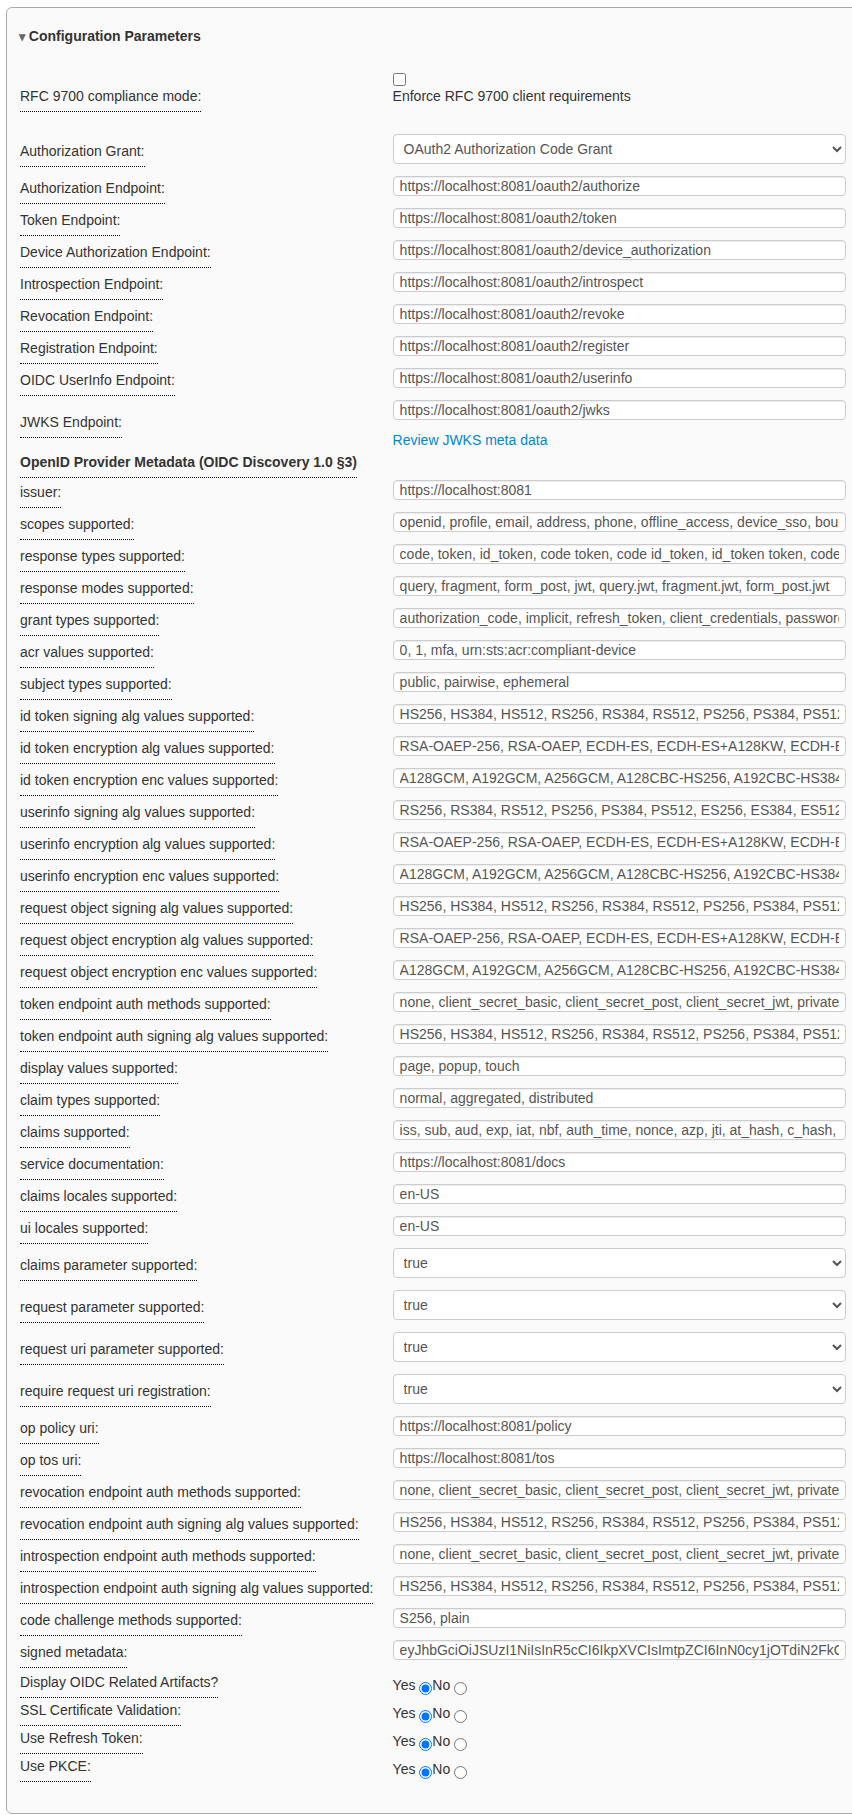
In Configuration Parameters, set Authorization Grant to OAuth2 Authorization Code Grant and Use PKCE to Yes.
- In Request Authorization Code, enter:
- Client ID: the client registered at the provider.
- Redirect URL:
https://localhost:3000/callback. - Scope: the scopes the client needs, separated by spaces.
The State and Nonce are generated for you, and so are the PKCE code_challenge, code_verifier and code_method (
S256). Request shows the URL that Authorize will open.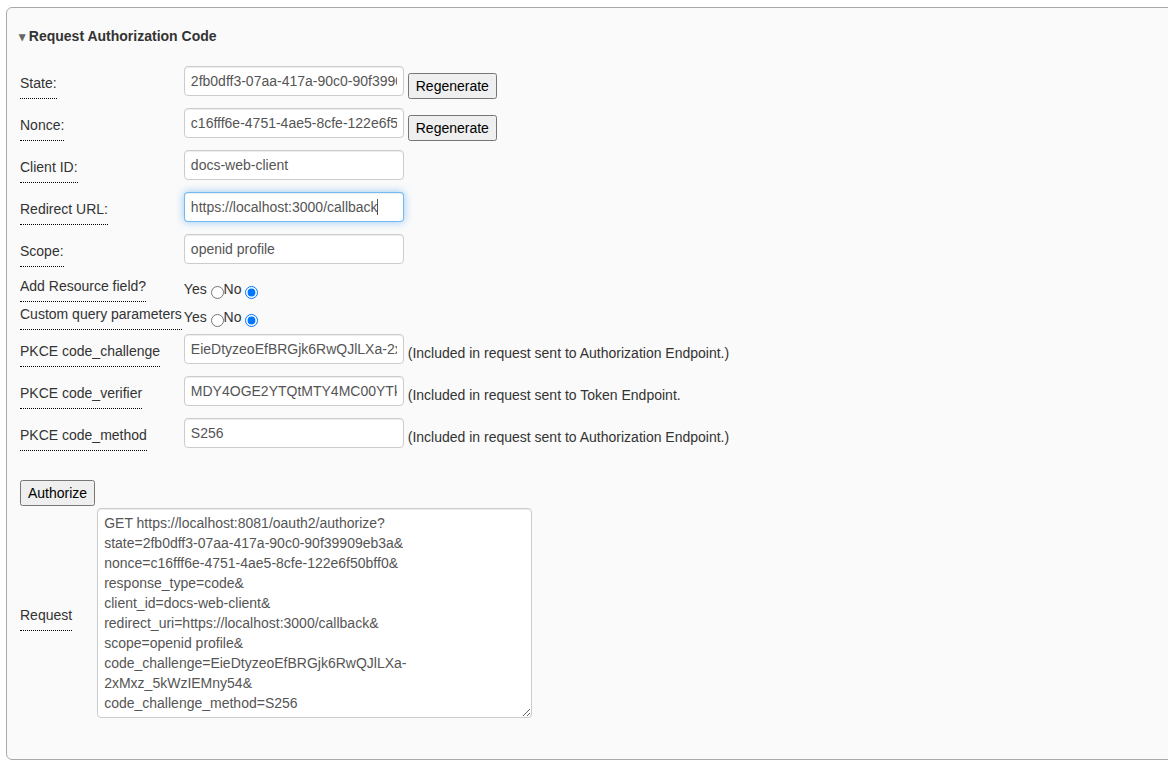
- Click Authorize. The browser goes to the provider.
At the provider
-
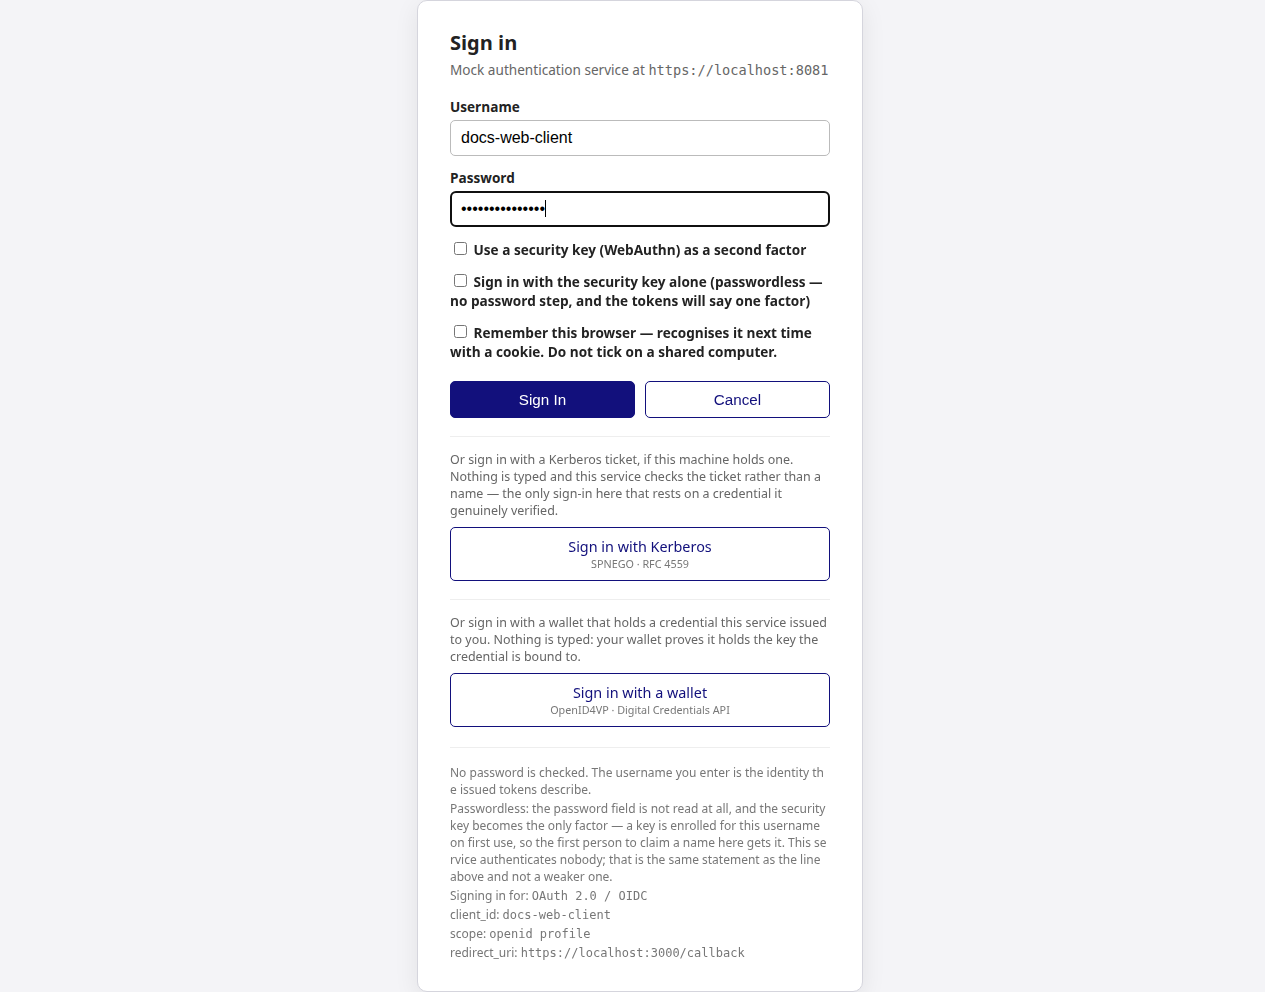
Sign in. With the mock STS any username works and the password is not checked. The username you type becomes the token’s subject.
-
If the provider asks you to allow access, click Allow. The browser returns to the debugger’s step 2 page, with the code already in the Authorization Code field.
Step 2 page
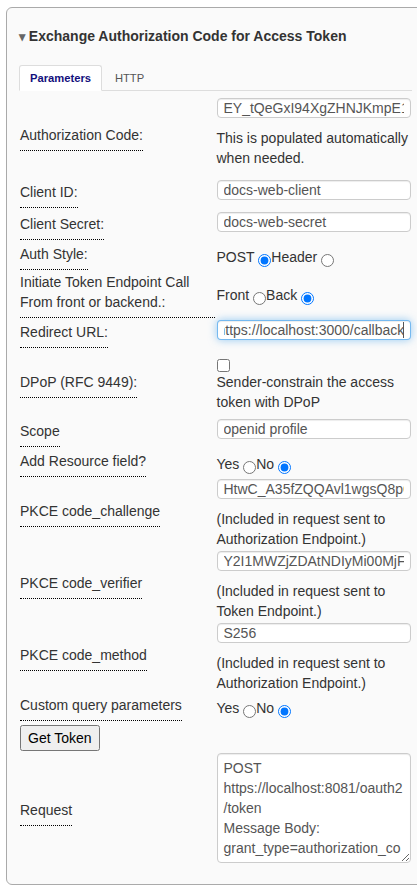
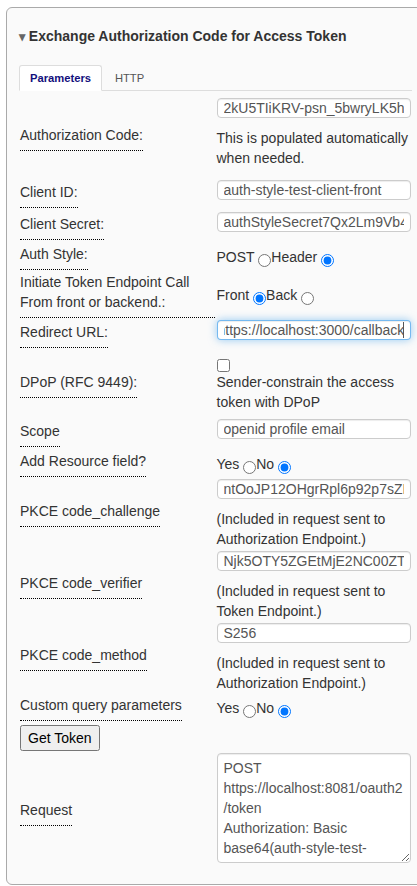
- In Exchange Authorization Code for Access Token, check the Client ID and Redirect URL. The redirect URL must match the one sent in step 3 exactly. For a confidential client, also enter the Client Secret and choose an Auth Style.
-
Click Get Token.
What you should see
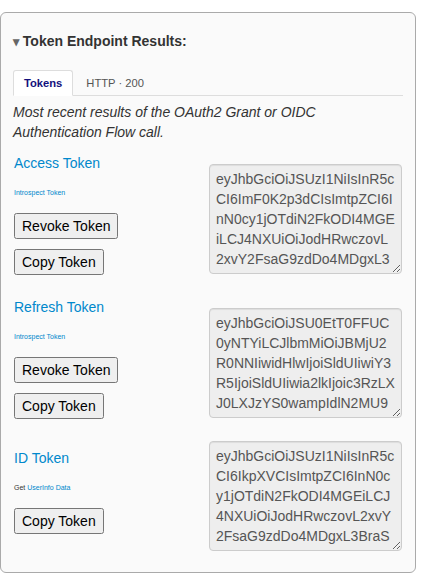
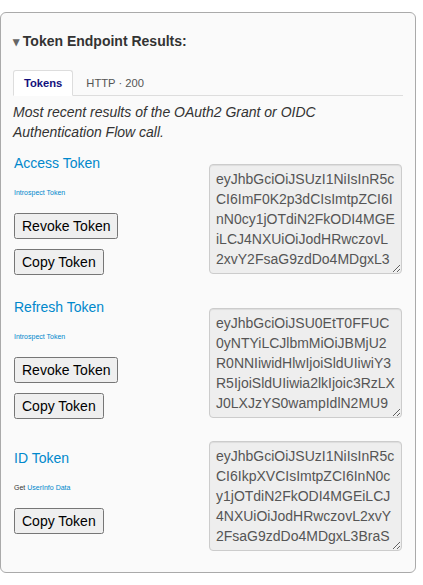
Token Endpoint Results shows the access token. It also shows a refresh
token if the provider issued one, and an ID token if you asked for the
openid scope.
If it goes wrong
- The provider shows an error instead of a sign-in page: the client ID or redirect URI does not match what is registered. The error is in the URL the browser returned to, and in the Authorization Endpoint Results pane.
invalid_grantfrom the token endpoint: the code has expired (they usually last a few minutes), was already used, or the redirect URL differs from the one in the authorization request.status: 0: the request never left the browser. See Front end or back end.
Implicit
The provider returns the access token directly on the redirect, in the URL fragment, and there is no token request. The token can leak through browser history and logs, and it cannot be sender-constrained, so this grant is only for testing older applications.
Steps
- Load the provider’s metadata.
- Set Authorization Grant to OAuth2 Implicit Grant.
-
In Request Access Token, enter the Client ID, Redirect URL and Scope, then click Authorize. The request carries
response_type=token.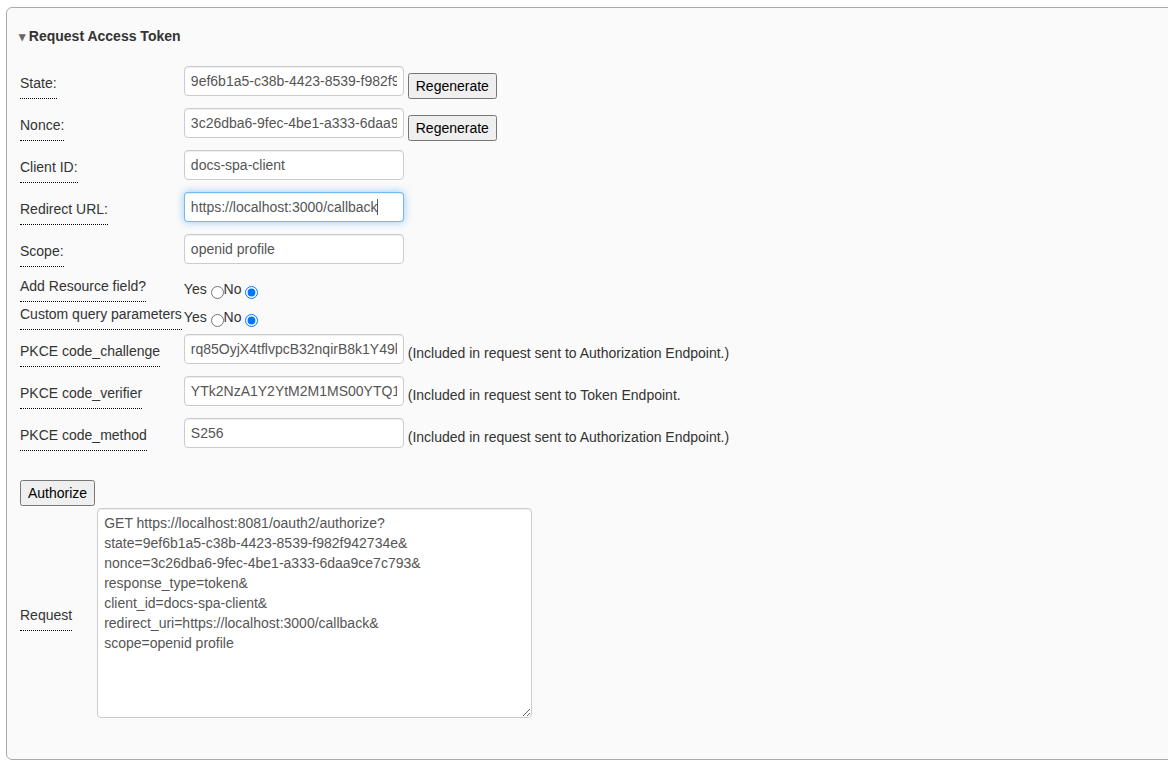
- Sign in at the provider (and allow access if asked).
What you should see
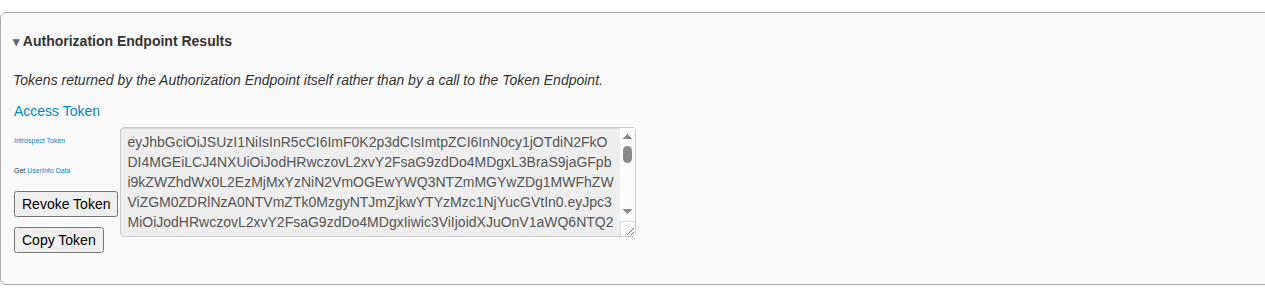
The step 2 page opens with the access token in Authorization Endpoint Results, because the token came from the authorization endpoint and not the token endpoint. There is no refresh token.
Resource Owner Password Credentials
The client collects the person’s username and password and sends them to the token endpoint itself. The person never sees the provider’s sign-in page, so none of the provider’s own protections (multi-factor authentication, for example) can apply. Use it only to test a provider that still allows it.
Steps
- Load the provider’s metadata.
- Set Authorization Grant to OAuth2 Resource Owner Password Credential Grant. The debugger goes straight to the step 2 page, because this grant has no authorization request.
- In Obtain Access Token, enter the Client ID, the Client Secret (for a confidential client), the Scope, and the person’s Username and Password.
-
Click Get Token.
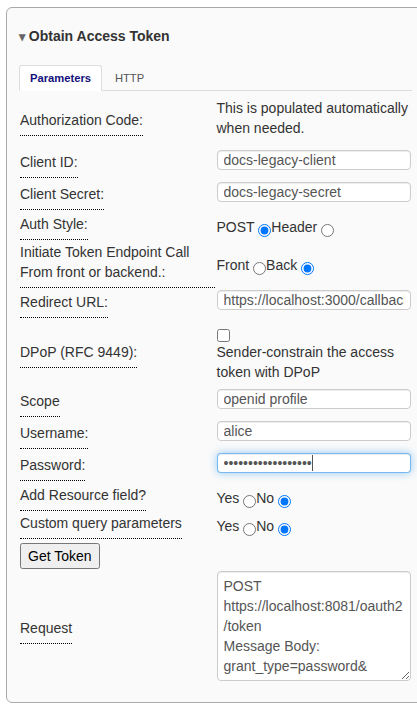
The password is used for this one request and is never saved.
What you should see
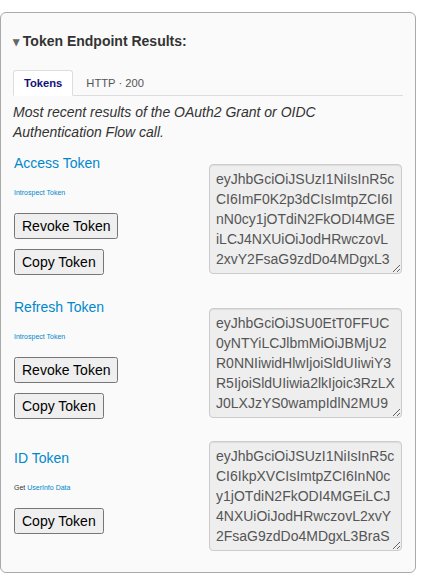
Token Endpoint Results shows the access token, and usually a refresh token.
If you asked for openid, it also shows an ID token.
Client Credentials
The client authenticates as itself and gets a token for its own use. No person signs in, so no refresh token or ID token is issued. Use it for service-to-service calls.
Steps
- Load the provider’s metadata.
- Set Authorization Grant to OAuth2 Client Credential. The debugger goes straight to the step 2 page.
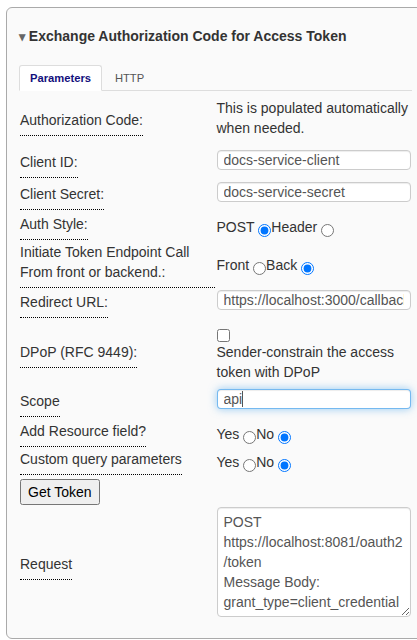
- In the token request pane, enter the Client ID, Client Secret and
Scope. Choose the Auth Style your provider expects: POST for
client_secret_postor Header forclient_secret_basic. -
Click Get Token.
What you should see
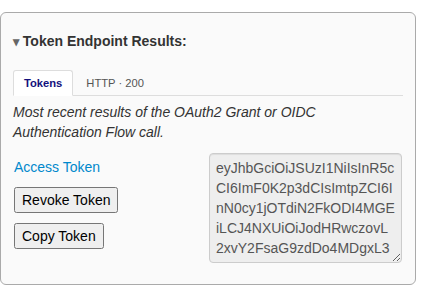
Token Endpoint Results shows a single access token. Its subject is the client itself.
If it goes wrong
invalid_client: the secret is wrong, or the provider expects the other Auth Style.unauthorized_client: the client is not allowed this grant, or it is a public client. A public client cannot use Client Credentials.invalid_scope: the client is not allowed one of the scopes you asked for.
Device Authorization (RFC 8628)
For a device that cannot show a browser, such as a TV or a command-line tool. The device asks the provider for a short user code. The person enters that code on another device (usually a phone) and approves the request, and the device then collects the tokens. The debugger plays the part of the device.
Steps
Step 1 page: ask for a user code
- Load the provider’s metadata. It must include a
device_authorization_endpoint. - Set Authorization Grant to OAuth2 Device Authorization Grant.
-
In Request Device Authorization, enter the Client ID and Scope, then click Authorize. This sends a
POSTto the device authorization endpoint; the browser does not leave the debugger.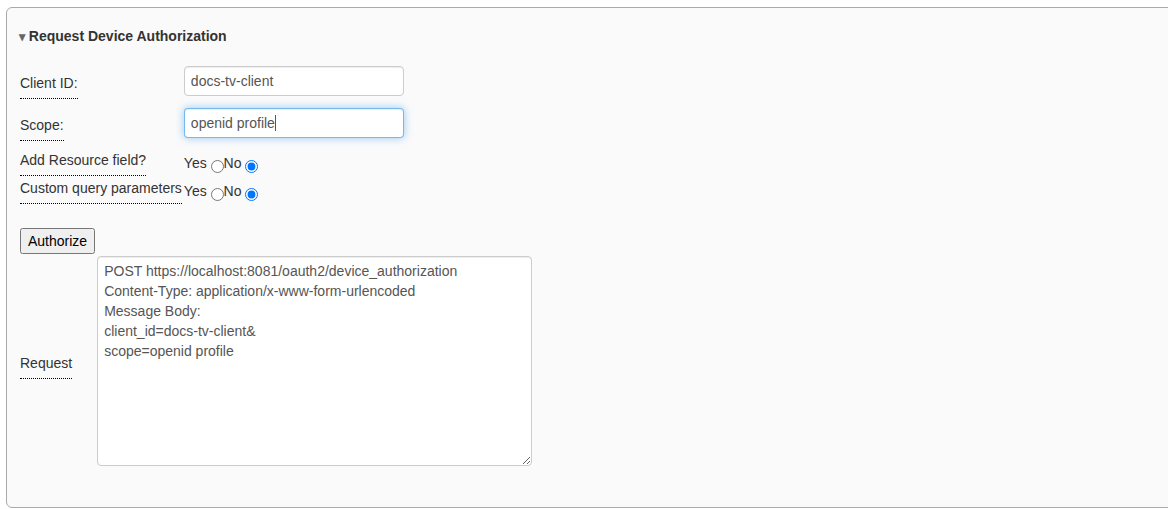
Step 2 page: the codes
-
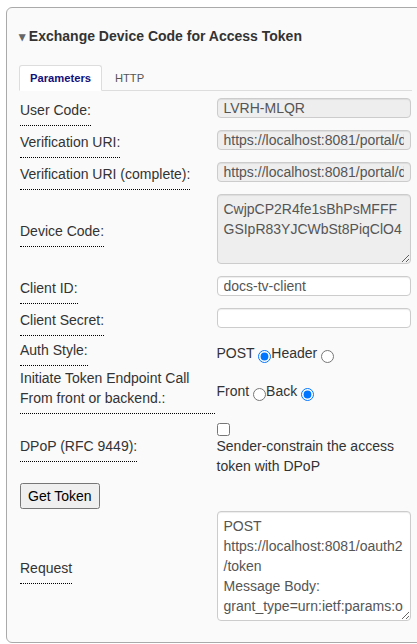
The step 2 page shows the provider’s answer: the User Code, the Verification URI (and the complete version with the code included) and the Device Code. Copy the verification URI.
On the “other device”: approve
-
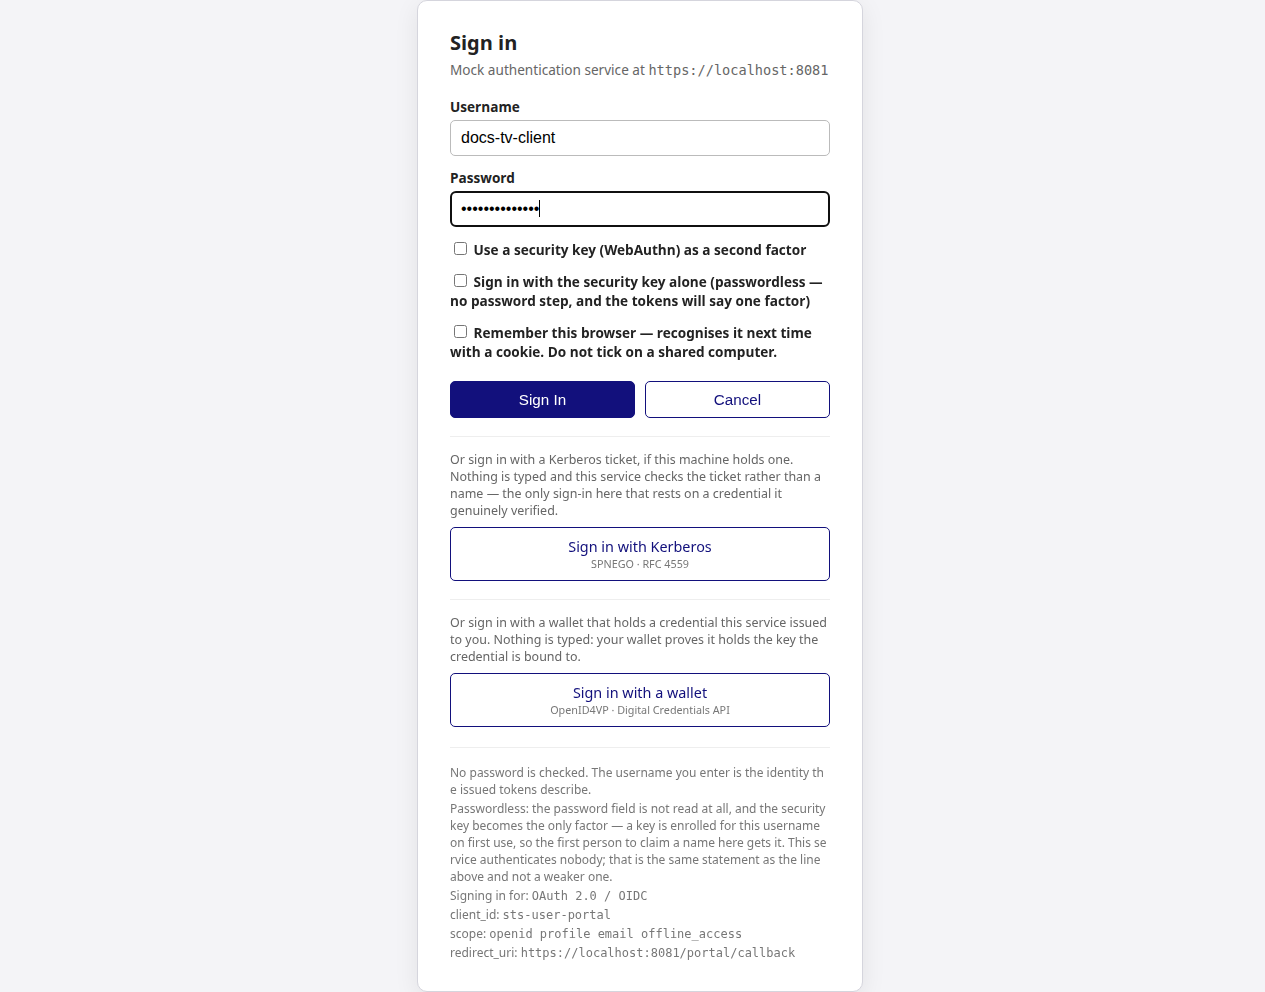
Open the verification URI in a browser (any tab, or another device). Sign in.
-
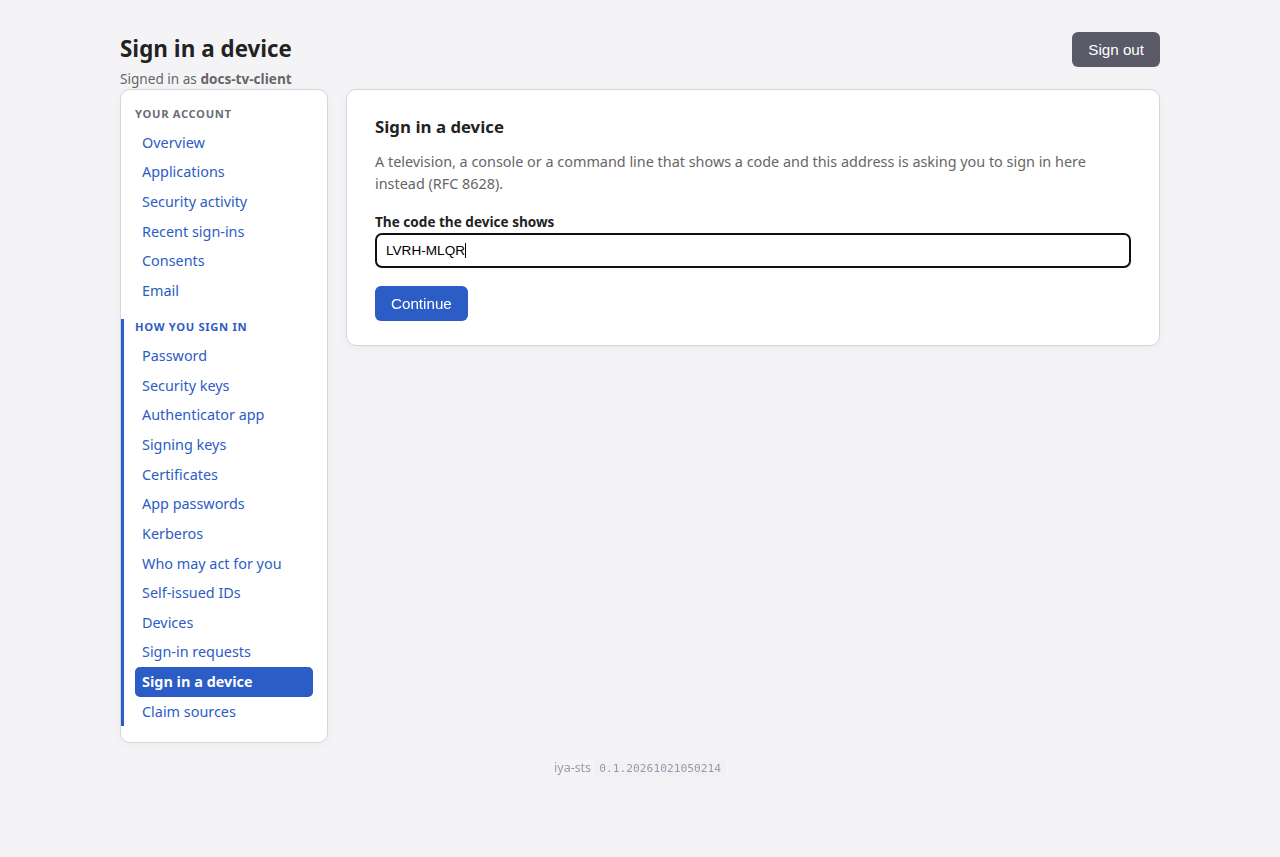
Enter the user code and click Continue. (With the complete verification URI the code is already filled in.)
-
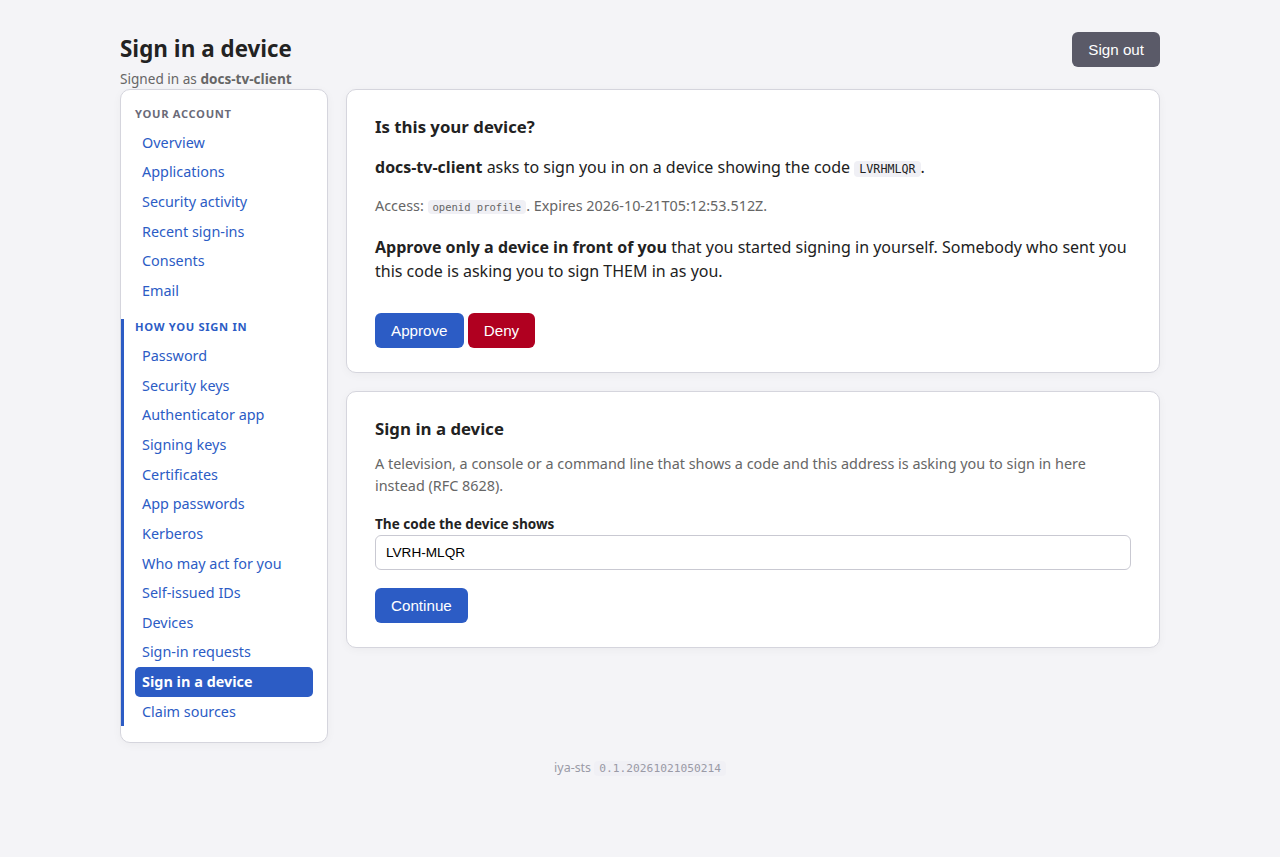
Check that the code matches the one the debugger shows, then click Approve.
Step 2 page: collect the tokens
- Go back to the debugger’s step 2 page. The device code is still filled in. Click Get Token.
What you should see
Token Endpoint Results shows the access token (and a refresh token and ID token, if the scope asked for them).
If you click Get Token before approving, the provider answers
authorization_pending. That is the expected answer while the person has not
yet decided: approve the request, then click Get Token again. A real
device polls the token endpoint until it gets a different answer. The other
answers are slow_down (poll less often), access_denied (the person clicked
Deny) and expired_token (start again from step 3).
Refresh Token
A refresh token gets a new access token without asking the person to sign in again. The debugger keeps the refresh token from the last token response and fills it in for you.
Refreshing needs a refresh token. Most providers issue one only to an
Authorization Code, Device Authorization or Password grant, and only when you
ask for the offline_access scope or the client is configured for it.
Steps
-
Run a grant that returns a refresh token. The example below uses the Authorization Code grant with a confidential client, sending its secret with Auth Style set to Header.
- Make sure Use Refresh Token is Yes in the configuration pane.
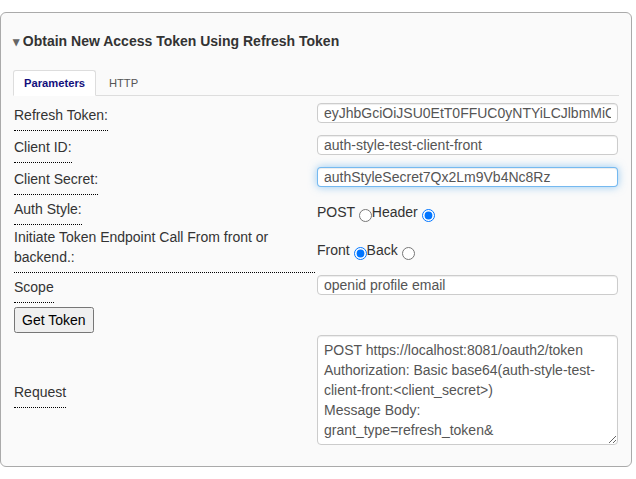
- Scroll to Obtain New Access Token Using Refresh Token. The Refresh Token and Client ID are filled in already. Enter the Client Secret for a confidential client, and choose the same Auth Style as before.
- Optionally change the Scope. You can ask for fewer scopes than the original grant, but not more.
-
Click Get Token.
What you should see
Token Endpoint Results for Refresh Token Call appears next to the original results, so you can compare the two sets. It shows the new access token, and a new refresh token if the provider rotates refresh tokens (RFC 9700 says public clients must). iteration counts the refreshes made since the original token response, starting at 0.
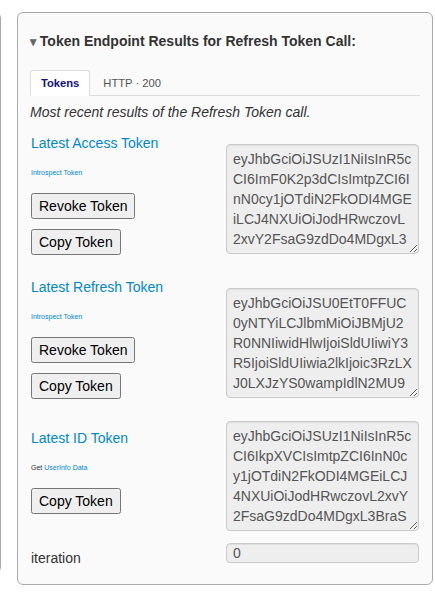
Click Get Token again to refresh again. When refresh tokens rotate, the old one stops working once it has been used; if the provider detects it being used a second time, it may revoke the whole family of tokens.
Token Exchange (RFC 8693)
Token Exchange trades a token you hold (the subject token) for a new one, usually for a different audience. A typical use is an API that receives a user’s token and needs a token to call another API on that user’s behalf.
Steps
- Run any grant that gives you an access token. The example uses the Authorization Code grant.
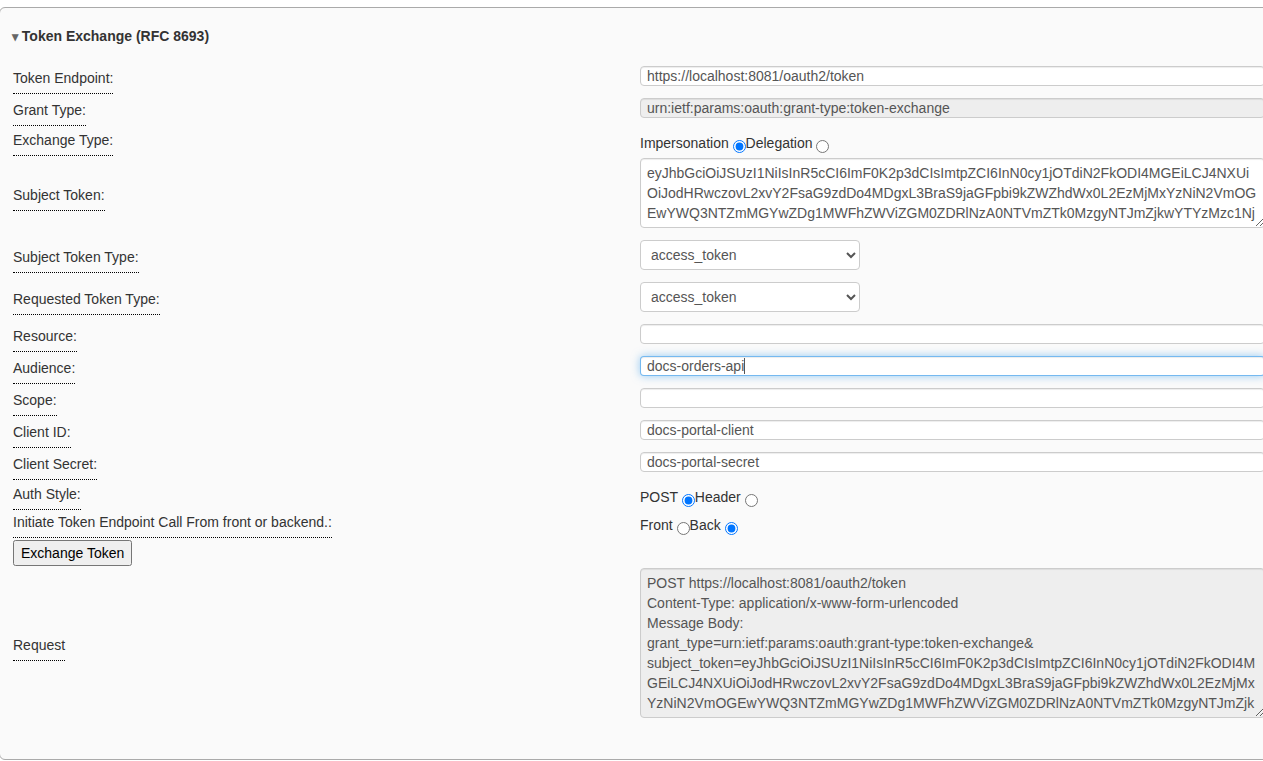
- Scroll to Token Exchange (RFC 8693) on step 2. The Subject Token is filled in with your latest access token.
- Choose the Exchange Type:
- Impersonation: the client acts as the subject, and the new token is simply about that subject.
- Delegation: someone else (the actor) acts on the subject’s behalf.
Actor Token and Actor Token Type fields appear; paste the actor’s
token there. Providers usually record the actor in an
actclaim.
- Set the Subject Token Type and Requested Token Type
(
access_tokenfor both in most cases). - Enter the target in Audience (a client ID or logical name) and/or Resource (a URL), and optionally a narrower Scope.
-
Enter the Client ID and Client Secret of the client making the exchange, choose an Auth Style, and click Exchange Token.
What you should see
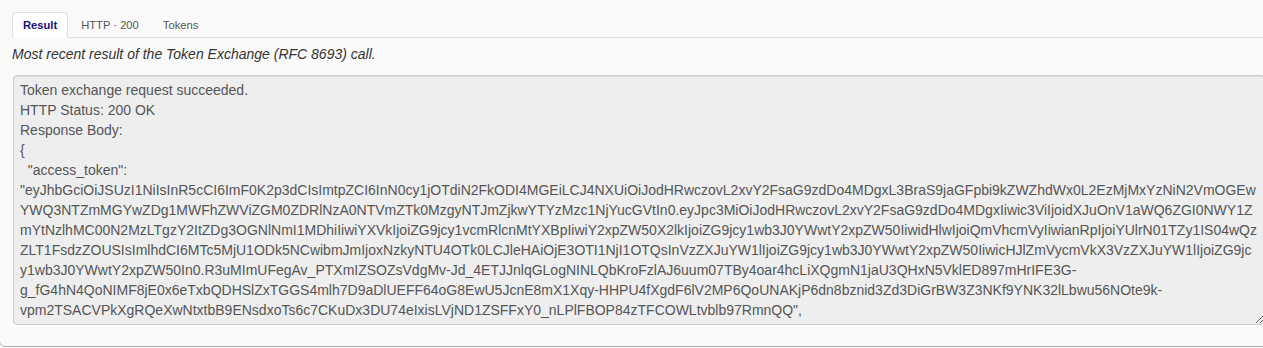
Token Exchange Results shows the HTTP status and the response body. The
response holds the new access_token, its issued_token_type, and its
token_type. The HTTP tab shows the exchange as it went over the wire,
and Tokens shows the new token with the usual buttons.
The most common refusal is invalid_target: the client is not allowed to ask
for that audience. Providers usually need the exchange to be permitted for the
pair of clients involved.
Related
- Using the OAuth2 / OIDC workflow: the common steps and panes.
- OpenID Connect authentication flows: ID tokens, nonces, and the Hybrid flows.
- RFC 9700 compliance mode: what the debugger checks when compliance mode is on.
- The mock STS’s Configuring OAuth 2.0 grants: how to set up the other side.